Step-by-Step Generate Video From Script Guide for Beginners (2025)

Imagine turning your written ideas into engaging videos in just a few clicks—even if you’ve never edited a video before.
In 2025, it’s easier than ever to generate video from script using powerful AI and user-friendly tools. This guide is designed to walk beginners through every step, making the process simple and approachable.
You’ll learn how to prepare a script, pick the right video tool, add voiceovers and visuals, edit, export, and share your finished video with the world.
Ready to create viral, professional-quality videos from your words? Let’s break down the barriers and get you started with a clear, step-by-step roadmap.
Understanding the Basics: Why Generate Videos from Scripts?
The way we create videos is changing at breakneck speed. Thanks to AI and automation, it’s now possible to generate video from script with just a few clicks—no studio, crew, or expensive gear required. In fact, 41% of brands using AI for video creation shows how quickly these tools are taking off, making professional video creation accessible to everyone, not just big businesses. The landscape is evolving so rapidly that even complete beginners can jump in and produce high-quality content with minimal learning curve.
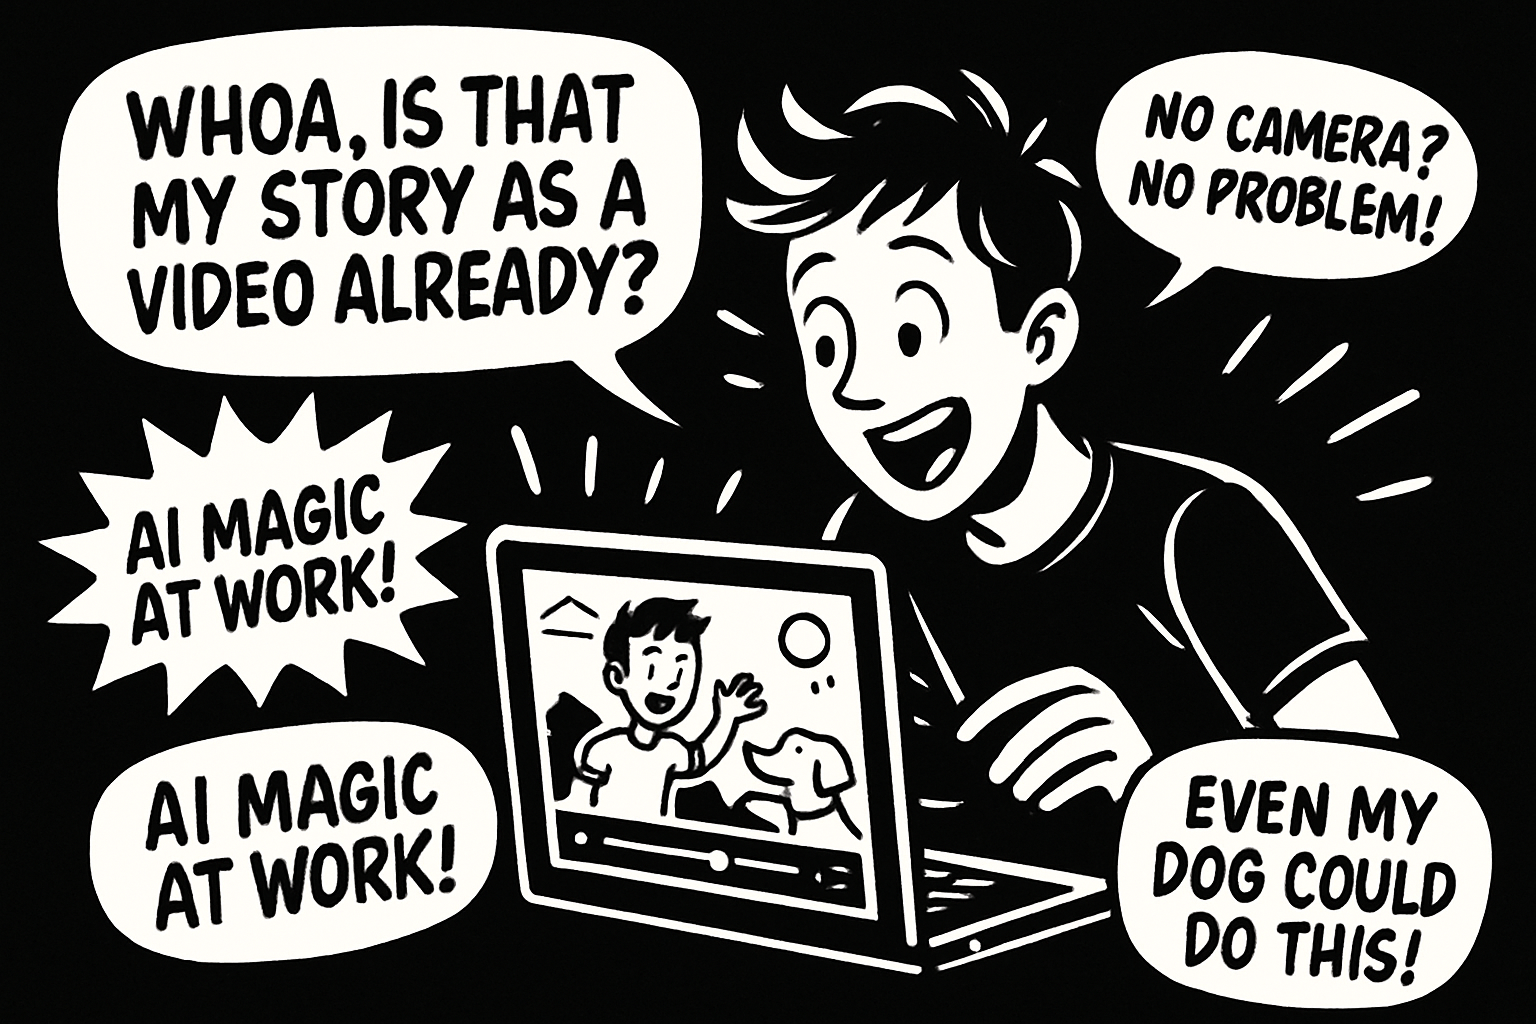
For those just getting started, the ability to generate video from script means you don’t need editing experience or a fancy set-up. The process is streamlined and beginner-friendly—perfect for anyone looking to make YouTube Shorts, TikTok videos, Instagram Reels, or quick explainer videos. Here’s why this matters:
- Time savings: Go from idea to published video in minutes.
- Cost savings: Skip hiring editors or buying expensive software.
- Accessibility: Make videos without ever showing your face.
- Scalability: Repurpose scripts into multiple formats for different platforms.
When you generate video from script, you open the door to a world of creative possibilities. Think about Reddit story channels that bring text posts to life, or educators turning lesson plans into animated explainers. Even brands are using this approach to maintain privacy and build unique visual identities with AI voiceovers and custom avatars. Here’s how script-based video is being used today:
| Use Case | Benefit |
|---|---|
| Reddit Stories | Anonymous, engaging storytelling |
| Educational Videos | Clear, repeatable explanations |
| Brand Content | Consistent messaging, privacy |
| Social Shorts | Fast, viral-ready production |
The biggest advantage? Script-to-video tools are breaking down barriers. Anyone can now generate video from script, regardless of background, budget, or experience. This democratization is fueling a new creative economy where more voices are heard and ideas are brought to life with ease. As technology continues to evolve, the only limit is your imagination—so why not start creating today?
Step 1: Preparing Your Script for Video
Turning your ideas into a compelling video starts long before you hit “record.” The script is your blueprint—it guides everything from voiceover to visuals. If you want to generate video from script that truly stands out, mastering script prep is the first step. Let’s break down how to write with video in mind, even if you’re just starting out.
Writing for Visual Storytelling
When you generate video from script, think visually from the start. Keep your language concise and punchy—videos move fast, and viewers have short attention spans.
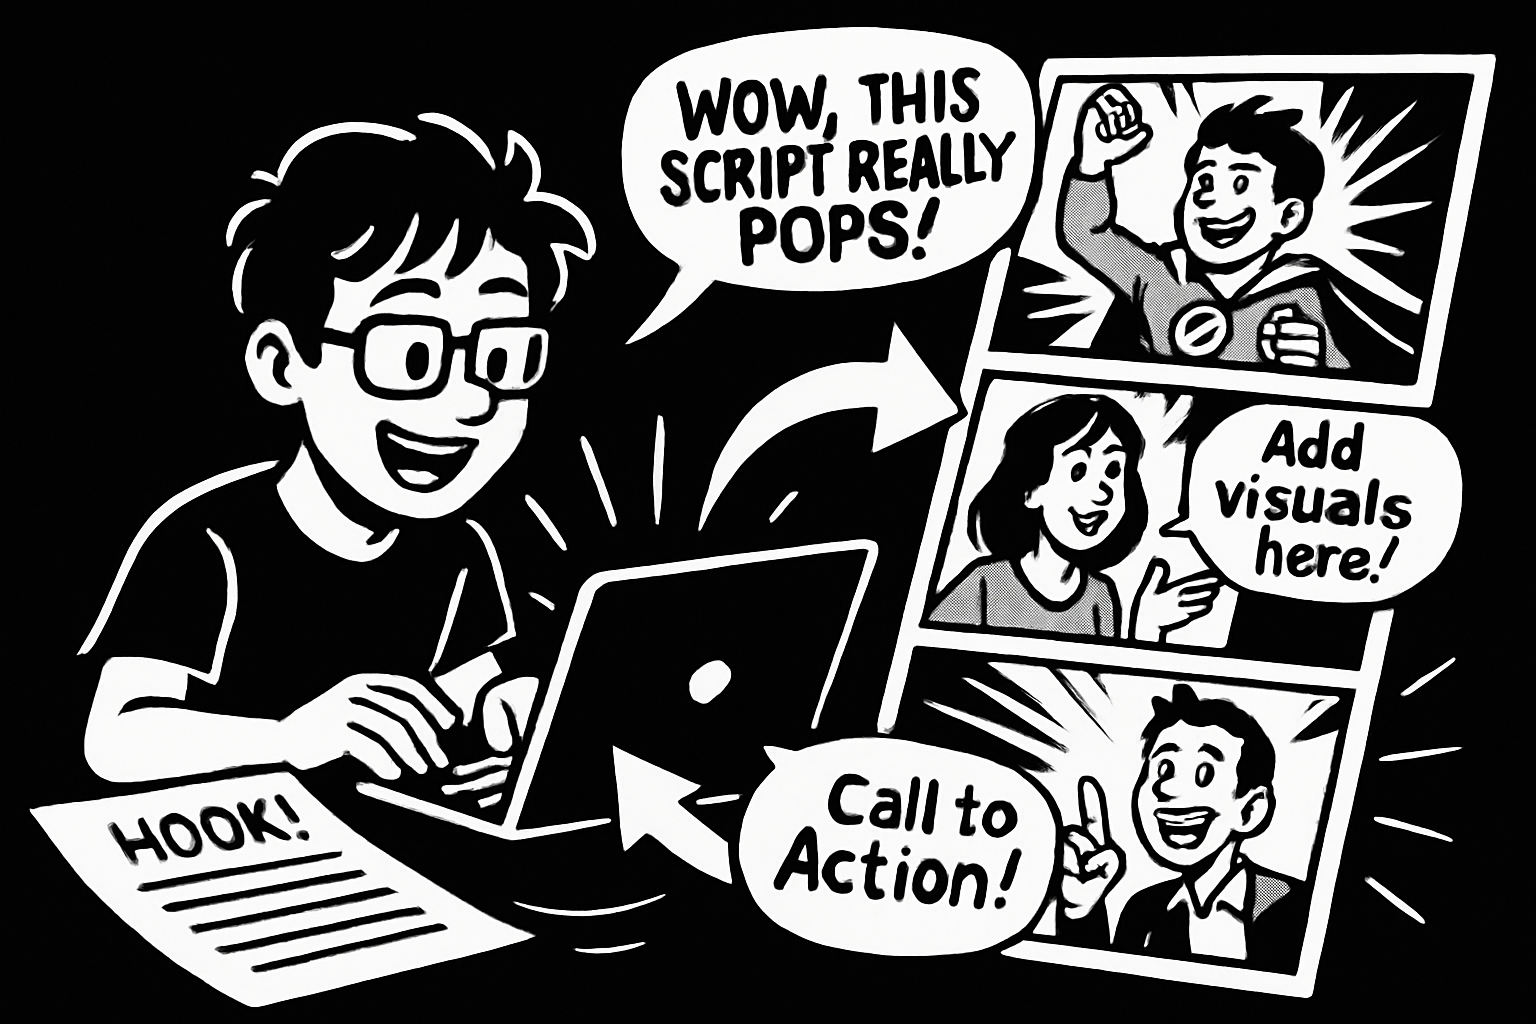
Start your script with a strong hook. Ask a question, share a surprising fact, or set up a relatable scenario. Your body should flow logically, breaking ideas into short, easy-to-narrate sentences. End with a clear call to action—what do you want viewers to do next?
Structure matters. Try this simple outline:
- Hook: Grab attention in the first few seconds.
- Body: Share your main message in 2-3 key points.
- Call to Action: Encourage likes, shares, or comments.
Adapt your text for spoken delivery. Written language often needs trimming; spoken words should sound natural. A good rule is to aim for 120-150 words per minute for voiceovers. This keeps your video engaging and easy to follow.
Don’t forget visual cues. Add notes like “show product close-up” or “insert animation here” right in your script. These prompts help you match visuals to your narration later.
Here’s a quick example. Let’s say you have a 300-word blog post about productivity tips. To generate video from script, you’d distill it to a 60-second script, highlight one tip per scene, and add simple directions like “on-screen text: ‘Tip #1: Batch your tasks.’”
Common mistakes? Overly complex language, missing scene cues, or scripts that are too long for your video’s format. Use tools like Google Docs, Notion, or dedicated scriptwriting apps to organize and edit your work efficiently.
Editing and Proofreading for Clarity
A clean script is your secret weapon when you generate video from script. Sloppy or unclear writing leads to extra editing and awkward voiceovers down the line. Always take a pass (or two) to polish your draft.
Read your script aloud. This helps catch clunky phrases or unnatural pacing. If a sentence trips you up, it’ll likely trip up an AI or human voiceover too. Peer review is gold—ask a friend or colleague to listen and give feedback.
AI grammar checkers like Grammarly or built-in tools in Google Docs can catch errors you might miss. When prepping your script for AI narration, clarity is key. If you’re planning to use an AI voiceover, consider checking out Top AI voiceover tools in 2025 to see which platforms best interpret your writing style.
Here’s a quick checklist for editing:
- Break long sentences into shorter ones.
- Remove jargon and filler words.
- Double-check that every scene has a clear visual or action prompt.
- Ensure your call to action is direct and specific.
Remember, every great video starts with a script that’s ready for action. Take the time to refine, and you’ll set yourself up to generate video from script with far less hassle later on.
Step 2: Choosing the Right Script-to-Video Tool
Not all video creation tools are built the same—especially if you want to generate video from script quickly and easily. Picking the right platform can make the difference between a fun, streamlined process and a frustrating tech headache.
Let’s break down what you should look for before you invest your time (or money) in any script-to-video solution.

Key Features to Look For
When you want to generate video from script, the tool’s features should match your needs—no more, no less.
Here are the essentials to keep in mind:
- AI Voiceover Support: Does it offer natural-sounding voices in multiple languages? This is crucial for faceless or global content.
- Template Variety: Look for templates tailored to your goals—storytelling, slideshows, or conversation formats.
- Asset Libraries: Built-in stock footage, images, and music save you time and money.
- Customization: Can you tweak fonts, colors, and transitions to match your brand?
- Export Options: Make sure it supports different resolutions and aspect ratios for YouTube, TikTok, or Instagram.
- Pricing Models: Some tools are free, some paid, and many use credit systems or add watermarks on exports.
- Ease of Use: A clean user interface is key, especially if you want to generate video from script without a steep learning curve.
The right tool should make you feel empowered—not overwhelmed. As the AI video market explodes, more platforms are adding features for beginners. In fact, according to AI video creation market projections, the creative economy is set for massive growth, opening doors for anyone looking to generate video from script.
With Clipstack, flipping a raw script into a thumb-stopping video is honestly a copy-paste, one-click vibe. Drop your words in, tap “Generate,” and the AI grabs punchy stock footage, slaps on captions, and lays down a studio-smooth voiceover—all in a single pass. No timelines to wrangle, no heavy software to learn, just your idea served up as a polished TikTok, YouTube Short, or faceless Reddit story in minutes. Clipstack bulldozes every tech hurdle so you can hit publish faster than you can say “next viral post.”
Step 3: Generating Voiceover and Visual Assets
So, you’ve polished your script and picked your tool—now it’s time to bring your story to life with voice and visuals. This step is where you’ll really start to see how easy it is to generate video from script, even if you’re brand new to content creation.
Creating AI Voiceovers
Voiceovers set the mood and pace for your video, making your message more relatable and dynamic. When you generate video from script, picking the right AI voice is like casting the perfect actor. Start by selecting a style: do you want a friendly female voice, a calm male narrator, or even a regional accent? Most AI tools now let you experiment with gender, age, accent, and tone.
Adjust pacing and emotion to fit your story. If your script is upbeat, dial up the enthusiasm. For explainer videos, a steady, clear delivery works best. Top AI voiceover tools like ElevenLabs and Murf.ai offer advanced features, including pronunciation tweaks and emotional inflection. Pricing varies—some have generous free tiers, while others charge per minute or by subscription.
To achieve a natural sound, avoid robotic monotony. Break up sentences, add pauses, and listen to samples before finalizing. Here’s a quick example: you paste your script into the tool, choose a voice, make minor tweaks, and within minutes, you have a professional-sounding narration. This seamless process is why so many creators now generate video from script instead of hiring voice actors.
Sourcing and Creating Visuals
Visuals are the heartbeat of engaging videos. When you generate video from script, you’ll want your images and clips to match your narrative cues. Most script-to-video tools come with built-in stock libraries—think photos, video clips, and even music. But AI-generated visuals are taking center stage in 2025, letting you create custom graphics or animations on the fly.
Want to keep your video copyright-safe? Stick to assets provided by your platform, or use royalty-free sites. For an extra personal touch, try DIY options: record your own clips, create simple animations, or design branded graphics. Remember, high-contrast, relevant visuals help your video stand out—according to HubSpot, 85% of top social videos use this tactic.
Industry leaders are investing in AI to make visual creation even more accessible. Adobe's AI-powered tools drive revenue growth, showing how AI is reshaping content creation for everyone. This tech makes it easier than ever for beginners to generate video from script while staying creative and copyright-compliant.
Step 4: Assembling and Editing Your Video
Ready to see your script spring to life? This stage is where your ideas become a real, shareable video. Whether you’re making a YouTube Short or an Instagram Reel, the process to generate video from script is surprisingly beginner-friendly with today’s tools.
Importing Assets into Your Video Tool
First things first—let’s gather your assets. To generate video from script, you’ll need your finalized script, voiceover audio, and all chosen visuals. Most AI video editors have simple dashboards where you can upload each file with just a click.
Here’s a quick checklist to keep you organized:
- Script file (text or SRT)
- Voiceover audio (MP3 or WAV)
- Visuals (stock clips, images, branded graphics)
- Logo and brand assets (PNG with transparency)
Upload each item into your video tool’s media library. Some platforms even let you paste your script directly and auto-generate scenes and timing, making it even easier to generate video from script.
Now, arrange your scenes on the timeline. Drag and drop visuals to match each script cue. Place your voiceover on the audio track, and trim as needed for perfect sync. Remember, most viewers expect tight pacing—don’t let scenes drag.
Pro tip: Use transitions and text overlays to highlight key points or calls to action. These little touches make your content pop and help you stand out when you generate video from script.
For platform-specific editing, check the table below:
| Platform | Aspect Ratio | Max Length | Recommended Export |
|---|---|---|---|
| TikTok | 9:16 | 60 sec | MP4, 1080x1920 |
| YouTube Shorts | 9:16 | 60 sec | MP4, 1080x1920 |
| Instagram Reels | 9:16 | 90 sec | MP4, 1080x1920 |
If you’re editing for multiple platforms, some tools let you instantly switch aspect ratios—saving tons of time as you generate video from script for different audiences.
Quality Control and Review
Before hitting publish, let’s make sure your video shines. Quality control is crucial when you generate video from script, especially if you want to avoid common beginner mistakes.
Use this quick review checklist:
- Audio and visuals are synced perfectly
- No awkward silences or mismatched scenes
- Transitions and effects enhance, not distract
- Brand logos and colors are consistent
- Call-to-action is clear and visible
Ask a friend or peer to watch your draft. Fresh eyes can spot pacing issues or typos you might miss. Some creators even use community forums to gather feedback before posting their first generate video from script project.
Finally, preview your video on different devices. What looks great on a laptop might need tweaks for mobile. A final polish here can mean the difference between a scroll-past and a viral hit.
Remember, every time you generate video from script, you’ll get faster and better. Embrace feedback, experiment, and keep improving—your next creation could be the one that takes off!
Step 5: Exporting, Publishing, and Optimizing Your Video
Bringing your project to life is the final, crucial step when you generate video from script. Let’s break down how to export, publish, and optimize your new creation for maximum reach and engagement.
Export Settings and File Formats
Before you share your masterpiece, you’ll need to export it in the right format. When you generate video from script, choose settings that match your platform and audience.
Popular export resolutions:
- 1080p (Full HD): Standard for most social platforms.
- 4K: For ultra-high-quality content (bigger files, use if needed).
- Vertical (9:16): TikTok, Instagram Reels, YouTube Shorts.
- Horizontal (16:9): YouTube, Facebook.
File formats to consider:
| Format | Use Case | Pros | Cons |
|---|---|---|---|
| MP4 | Universal platforms | Small size, high quality | Widely accepted |
| MOV | Apple devices/edit | Higher quality | Larger files |
Keep file sizes reasonable by using built-in compression tools. Over-compressing can hurt quality, so always preview before uploading. Double-check export settings to ensure your generate video from script project looks sharp and professional wherever it’s viewed.
Publishing to Multiple Platforms
Now it’s time to share your video with the world. Each platform has its own quirks, so plan your publishing strategy carefully.
Platform-specific tips:
- YouTube: Use 16:9 for standard videos, 9:16 for Shorts. Add a catchy thumbnail and fill in your metadata.
- TikTok & Instagram Reels: Go vertical (9:16), keep videos under 60 seconds, and use trending sounds or music if possible.
- Scheduling: Use built-in tools or third-party apps to batch upload and schedule releases. Consistency helps your generate video from script content find its audience.
Don’t forget to check analytics after publishing. Watch for views, watch time, and engagement rates. These insights help you refine future projects and understand what resonates with your viewers.
Optimization for Maximum Reach
To get your generate video from script content noticed, optimize every detail. Start with a scroll-stopping title—clear, catchy, and keyword-rich. Descriptions should highlight value and include relevant hashtags.
Pro optimization tips:
- Add subtitles and captions. With 85% of users watching videos on mute (Meta, 2024), accessibility boosts engagement.
- Repurpose your video: Clip highlights, teasers, or behind-the-scenes moments for cross-promotion.
- Use trending hashtags and experiment with different posting times to reach new audiences.
Here’s a quick example: A creator who optimized their generate video from script project with strong titles, captions, and strategic hashtags saw over 10,000 views in the first week—proof that a little extra effort pays off.
Keep learning from analytics, test new ideas, and remember—every great video starts with a script and a little creativity.
Troubleshooting and Best Practices for Beginners
Jumping into the world of generating video from script can feel overwhelming at first. But don’t worry—every beginner faces a few bumps in the road. Let’s break down the most common challenges and how to overcome them, so you can create videos with confidence.
Common Pitfalls & Quick Fixes
When you generate video from script, it’s easy to run into a few classic mistakes:
- Monotone voiceovers: AI narration sounding robotic.
- Mismatched visuals: Images or clips that don’t match your script.
- Awkward pacing: Scenes rushing or dragging, losing viewer attention.
- Missing call-to-action: Forgetting to prompt viewers at the end.
Quick Fixes Table:
| Issue | Quick Fix |
|---|---|
| Monotone voiceover | Adjust tone/speed in tool |
| Mismatched visuals | Swap assets, follow script cues |
| Pacing issues | Trim scenes, check timing |
| No CTA | Add text overlay or narration |
Take time to review your video before publishing. Most script-to-video tools let you preview and tweak each element—use this to your advantage!
Staying Updated & Legal Tips
To succeed as you generate video from script, keep up with new trends and platform algorithms. What works on YouTube Shorts today might not work tomorrow.
Stay informed by following:
- Video creator blogs and newsletters
- Social media updates from platforms like TikTok and Instagram
- Tutorials on new AI features
Legal matters count too: Always use copyright-safe visuals and music. Stick to stock libraries or create your own assets. Read up on fair use and each platform’s policies—better safe than sorry.
Community & Continuous Improvement
You don’t have to generate video from script alone. Join creator forums, Discord groups, or subreddits dedicated to video production. Sharing your work and getting feedback accelerates learning.
Here’s how to keep improving:
- Analyze analytics: Watch time, likes, and comments highlight what’s working.
- Try A/B testing: Change your script or visuals and compare results.
- Learn from others: See how top creators structure their videos.
Being part of a community helps you stay motivated and pick up new skills faster.
Encouragement for Beginners
Every expert who can generate video from script started right where you are. It’s normal to make mistakes and experiment with different styles.
Think of each video as a stepping stone. The more you create, the better you’ll get—just like learning to ride a bike. Don’t be afraid to try new ideas, ask for feedback, and celebrate small wins.
Remember, practice and persistence are your best friends. Keep going, and soon you’ll be making videos that stand out.Now that you’ve seen how simple it is to turn your ideas into amazing videos—even if you’ve never edited before—it’s time to take the leap yourself. Whether you want to share stories, grow an audience, or just experiment with the latest AI tools, everything you need is right at your fingertips. Don’t wait for “someday”—your first faceless video could be just a few clicks away. Let’s put your new skills to the test and see what you can create. Ready to dive in? Publish your First Faceless Short Today